# Adding Unsubscribe link in Emails using Google Apps Script
This blog was originally published on [RavSam blog](https://www.ravsam.in/blog/add-unsubscribe-link-in-emails-using-google-apps-script/).
When setting up our email marketing campaigns or newsletters, one thing that is often forgot is the **Unsubscribe link**. Not providing an option to unsubscribe from the mailing list can land our emails in spam. In this blog, we will look at how we can add an Unsubscribe link in our emails sent using Google Apps Script.
### Contents
* 1. Setting up a Spreadsheet
* 2. Writing a Hash Function
* 3. Writing Email Template
* 4. Writing Unsubscribe Code
* Results
### 1. Setting up a Spreadsheet
The first task is to set up a Spreadsheet.
* Create a new Google Spreadsheet and name the sheet as *emails*.
* Add the following fields in the top row of our spreadsheet.
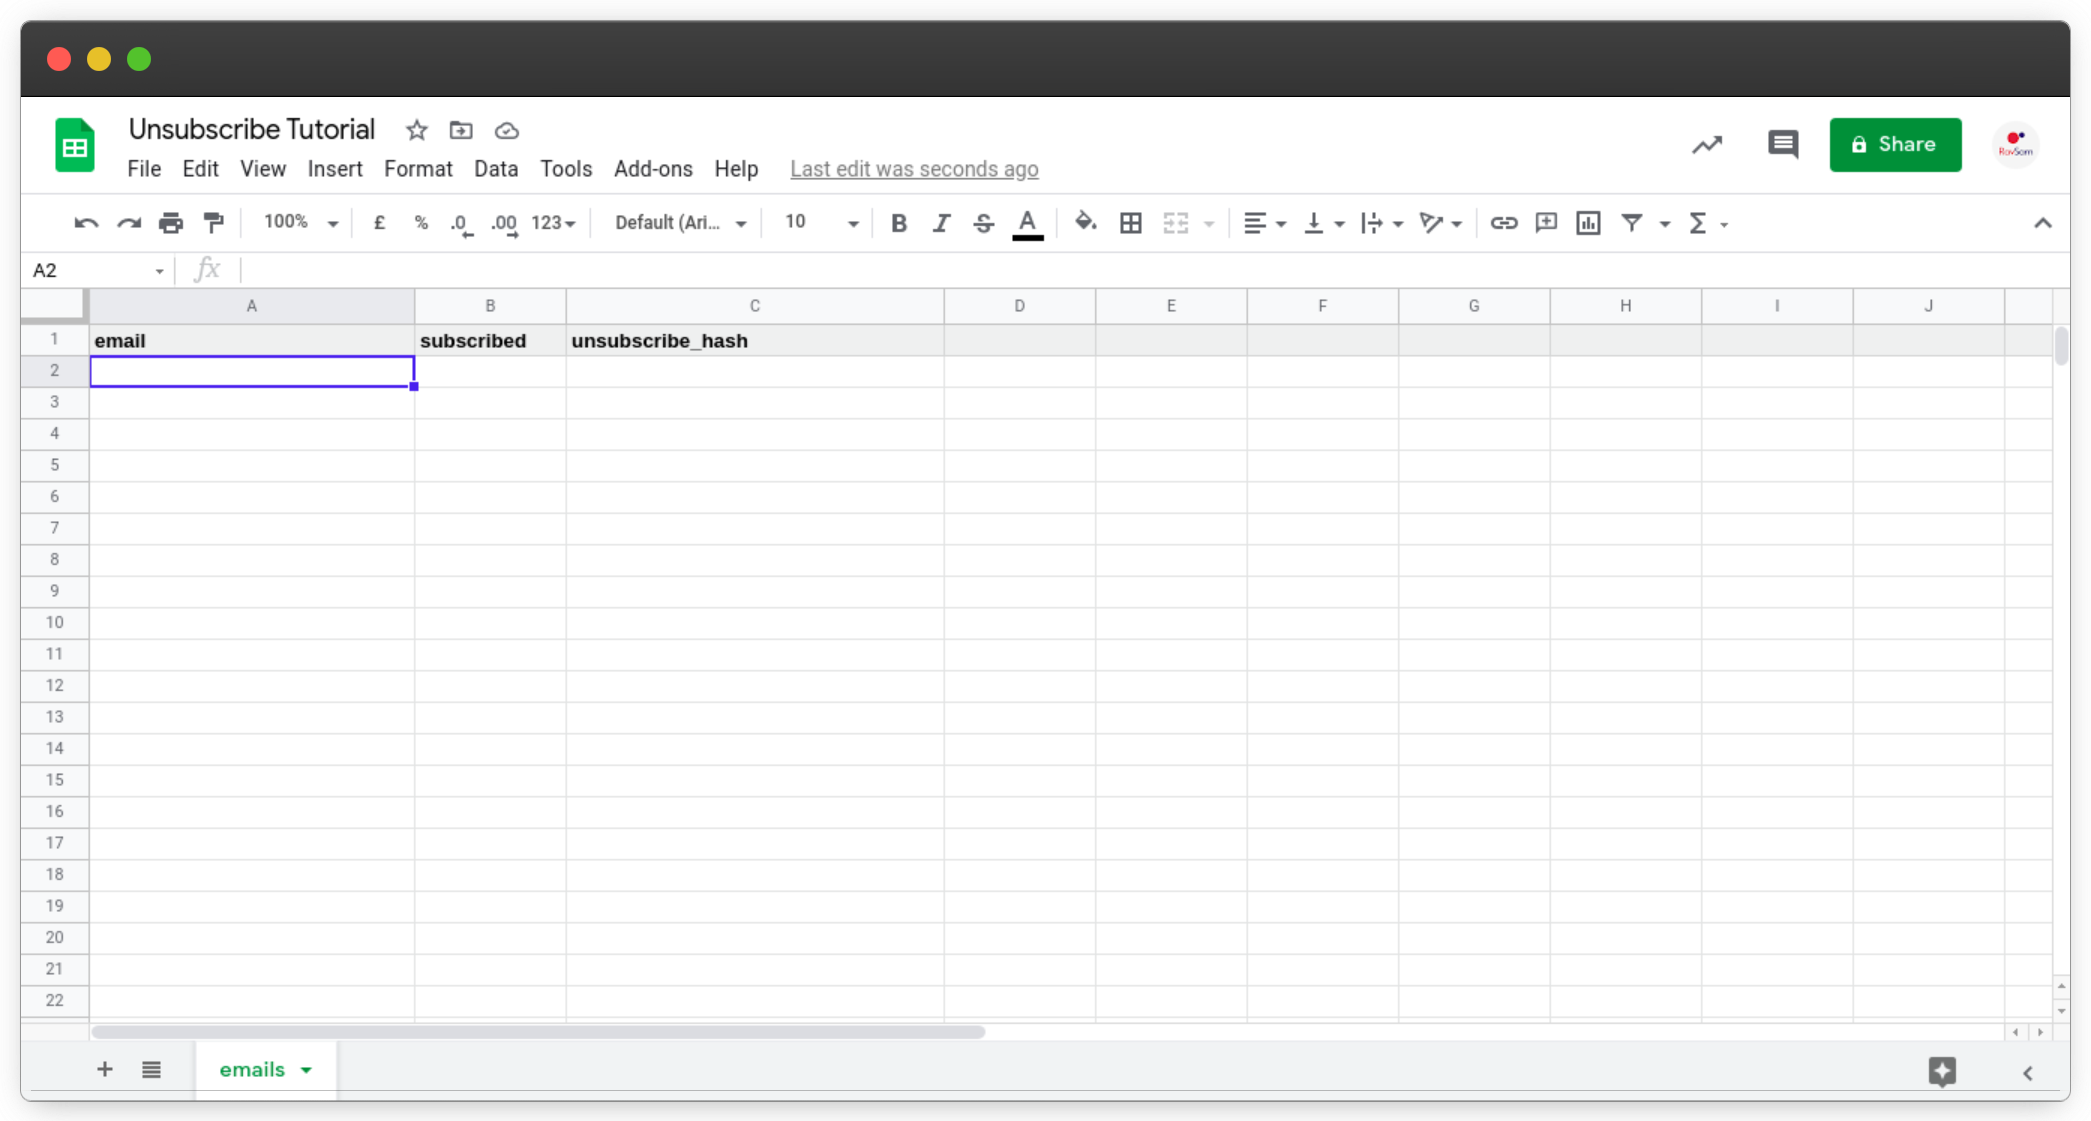*Format for Google Spreadsheet*
### 2. Writing a Hash Function
To provide a secure way to unsubscribe, we need to create a unique token for each of our subscribers. Google Apps Script provides us with utility functions to create a hash of a string using the MD5 hashing algorithm. The following function is used to create a hash of the string provided as a parameter.
```
function getMD5Hash(value) {
const digest = Utilities.computeDigest(Utilities.DigestAlgorithm.MD5,
value,
Utilities.Charset.UTF_8);
let hash = '';
for (i = 0; i < digest.length; i++) {
let byte = digest[i];
if (byte < 0) byte += 256;
let bStr = byte.toString(16);
if (bStr.length == 1) bStr = '0' + bStr;
hash += bStr;
}
return hash;
}
```
Since no two strings in the world have the same hash, this is the right way to provide unsubscribe tokens to our subscribers in our marketing campaigns or newsletters. However, there is a security problem here. If anyone knows the email of our subscriber, he can easily compute the hash and unsubscribe the subscriber from our email list. So, to make the hash impossible to guess, we can add some randomness to our email string. We can create a random string and append it to our original email string. The following snippet of code will help us to achieve our purpose.
```
function getMD5Hash(value) {
value = value + generateRandomString(8); // added this
const digest = Utilities.computeDigest(Utilities.DigestAlgorithm.MD5,
value,
Utilities.Charset.UTF_8);
let hash = '';
for (i = 0; i < digest.length; i++) {
let byte = digest[i];
if (byte < 0) byte += 256;
let bStr = byte.toString(16);
if (bStr.length == 1) bStr = '0' + bStr;
hash += bStr;
}
return hash;
}
function generateRandomString(length) {
const randomNumber = Math.pow(36, length + 1) - Math.random() * Math.pow(36, length);
const string = Math.round(randomNumber).toString(36).slice(1);
return string;
}
```
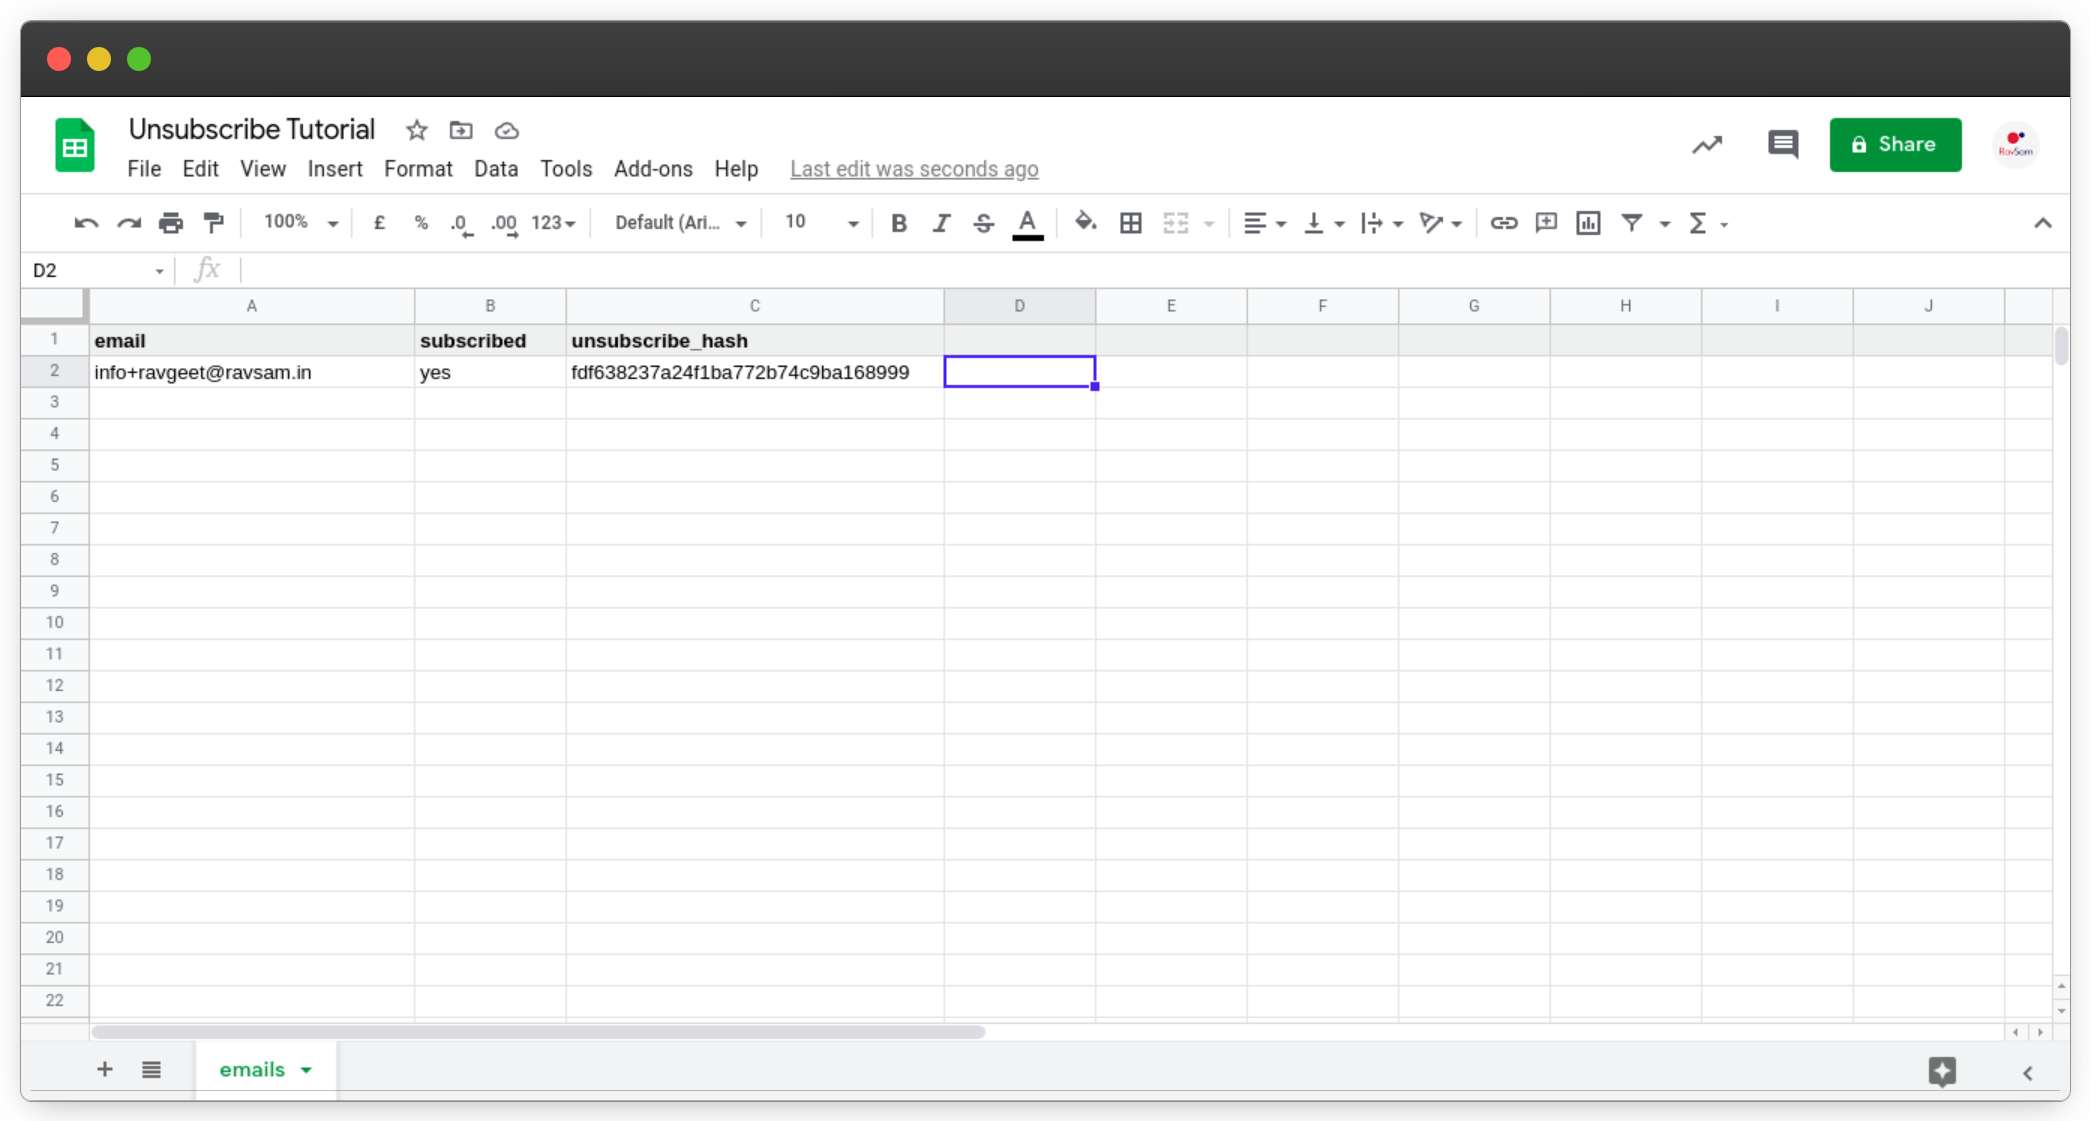*Google Spreadsheet with Unsubscribe Hashes*
### 3. Writing Email Template
Let us create a basic HTML template for testing our Google Apps Script for the unsubscribing feature. Our email template contains the link for unsubscribing. We have also provided two parameters, *email* and *unsubscribe_hash*. When the subscriber will tap this link, it will send a **GET request** to our Google Apps Script deployed as a Web App.
```
We are testing our unsubscribe feature
Unsubscribe
```
> Make sure to replace the values in curly braces.
### 4. Writing Unsubscribe Code
The final step to bring our workflow together is to write a code that handles our unsubscribe functionality. In our `Main.gs`, let us add the following code to handle the GET request as we discussed earlier:
```
function doGet(e) {
const email = e.parameter['email'];
const unsubscribeHash = e.parameter['unsubscribe_hash'];
const success = unsubscribeUser(email, unsubscribeHash);
if (success) return ContentService.createTextOutput().append('You have unsubscribed');
return ContentService.createTextOutput().append('Failed');
}
```
The above script is pretty self-explanatory. First of all, we retrieve the *email* and *unsubscribe_hash* from the query parameters and pass them to our `unsubscribeUser` function. Based on the output of our function, we return an appropriate response.
Let us write the code for `unsubscribeUser`:
```
function unsubscribeUser(emailToUnsubscribe, unsubscribeHash) {
// get the active sheet which contains our emails
let sheet = SpreadsheetApp.getActiveSpreadsheet().getSheetByName('emails');
// get the data in it
const data = sheet.getDataRange().getValues();
// get headers
const headers = data[0];
// get the index of each header
const emailIndex = headers.indexOf('email');
const unsubscribeHashIndex = headers.indexOf('unsubscribe_hash');
const subscribedIndex = headers.indexOf('subscribed');
// iterate through the data, starting at index 1
for (let i = 1; i < data.length; i++) {
const row = data[i];
const email = row[emailIndex];
const hash = row[unsubscribeHashIndex];
// if the email and unsubscribe hash match with the values in the sheet
// then update the subscribed value to 'no'
if (emailToUnsubscribe === email && unsubscribeHash === hash) {
sheet.getRange(i+1, subscribedIndex+1).setValue('no');
return true;
}
}
}
```
In the above function, we simply iterate our Google Sheet and check for the details for every subscriber. If the subscriber’s email and unsubscribe hash match with those sent as a query parameter, we unsubscribe the subscriber by updated the value in the sheet.
### Results
Let us send a test email to our subscribers specified in the Google Sheet.
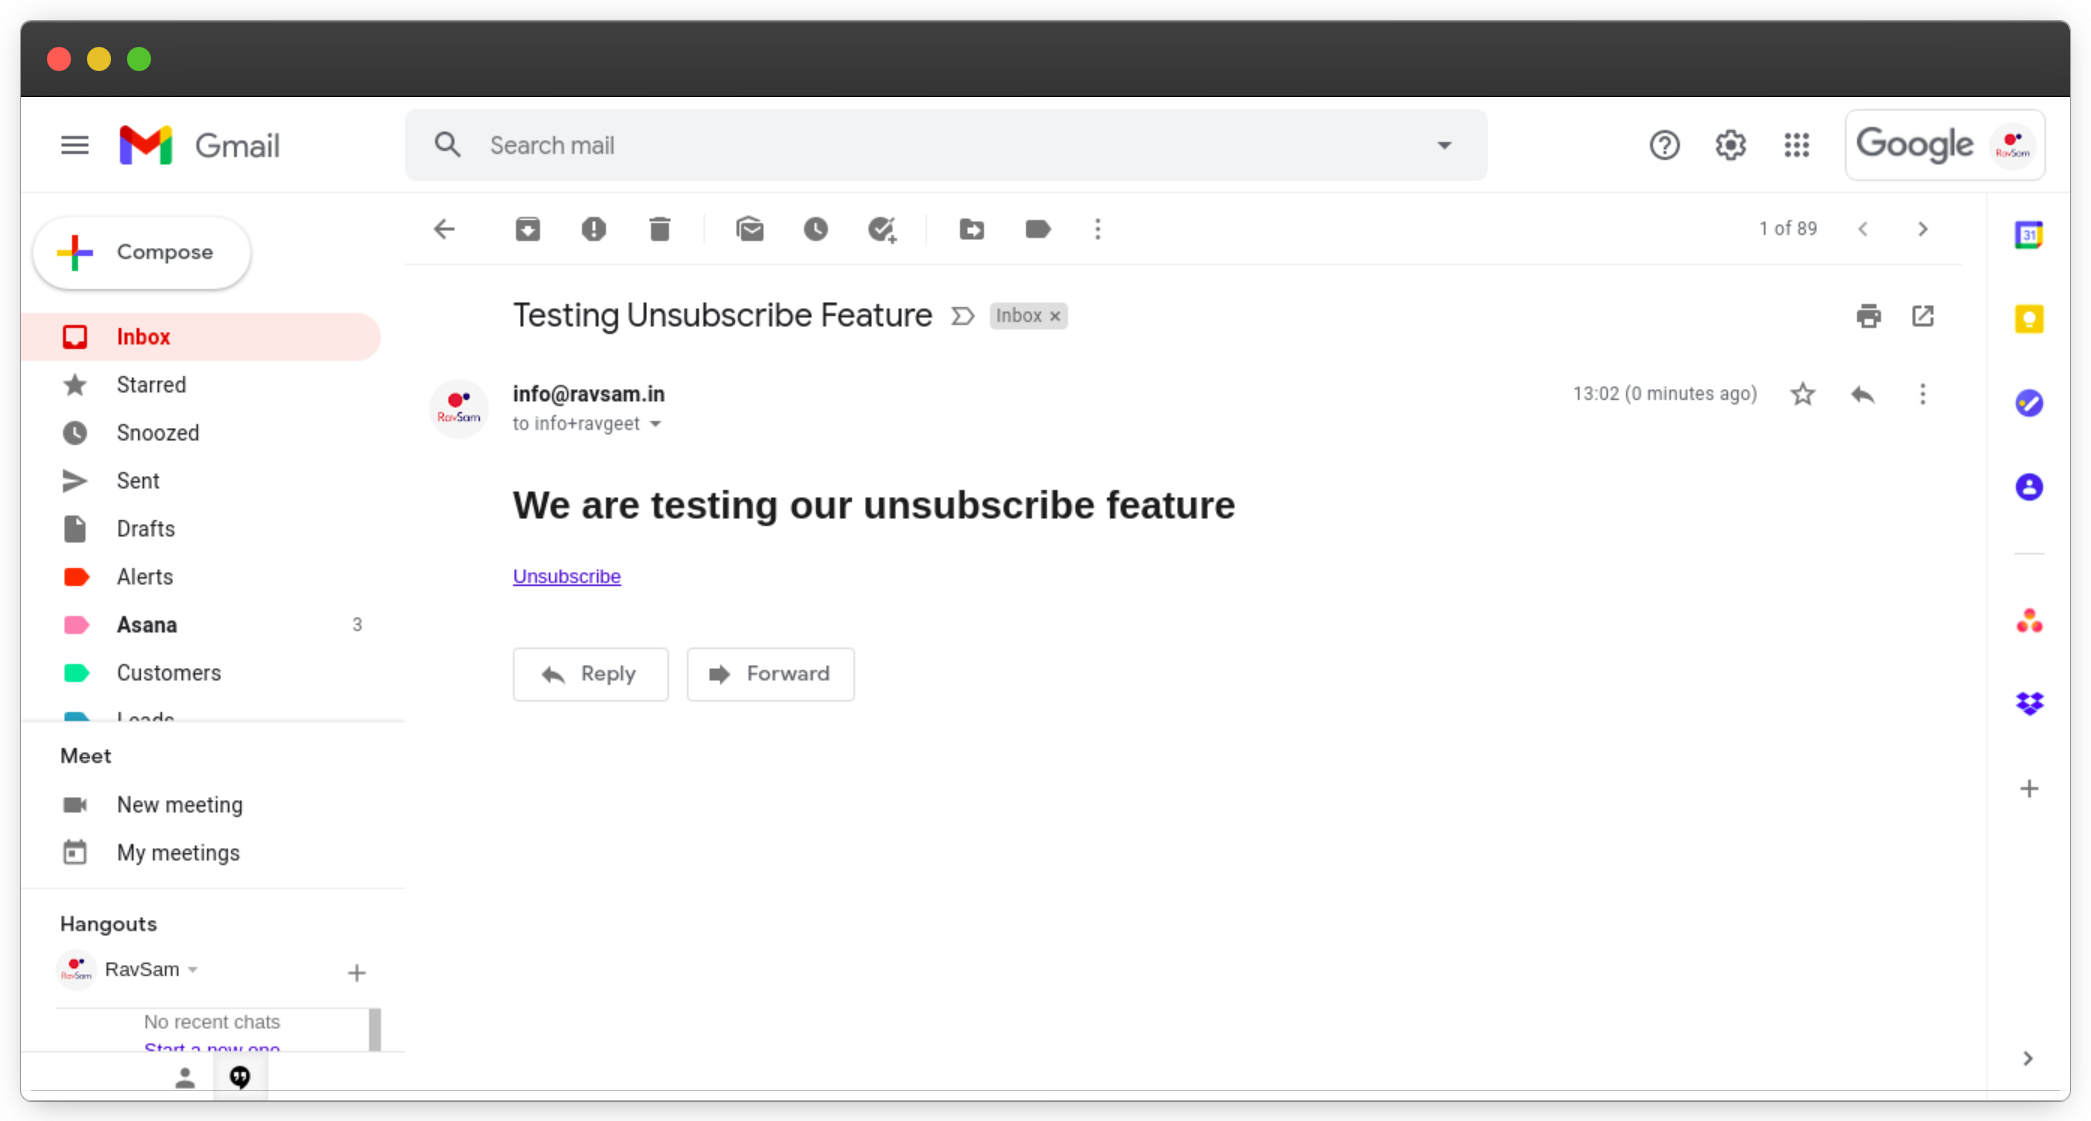*An email with Unsubscribe link*
We can see that we have received our email with an option to **Unsubscribe**. Let us unsubscribe and check back our sheet.
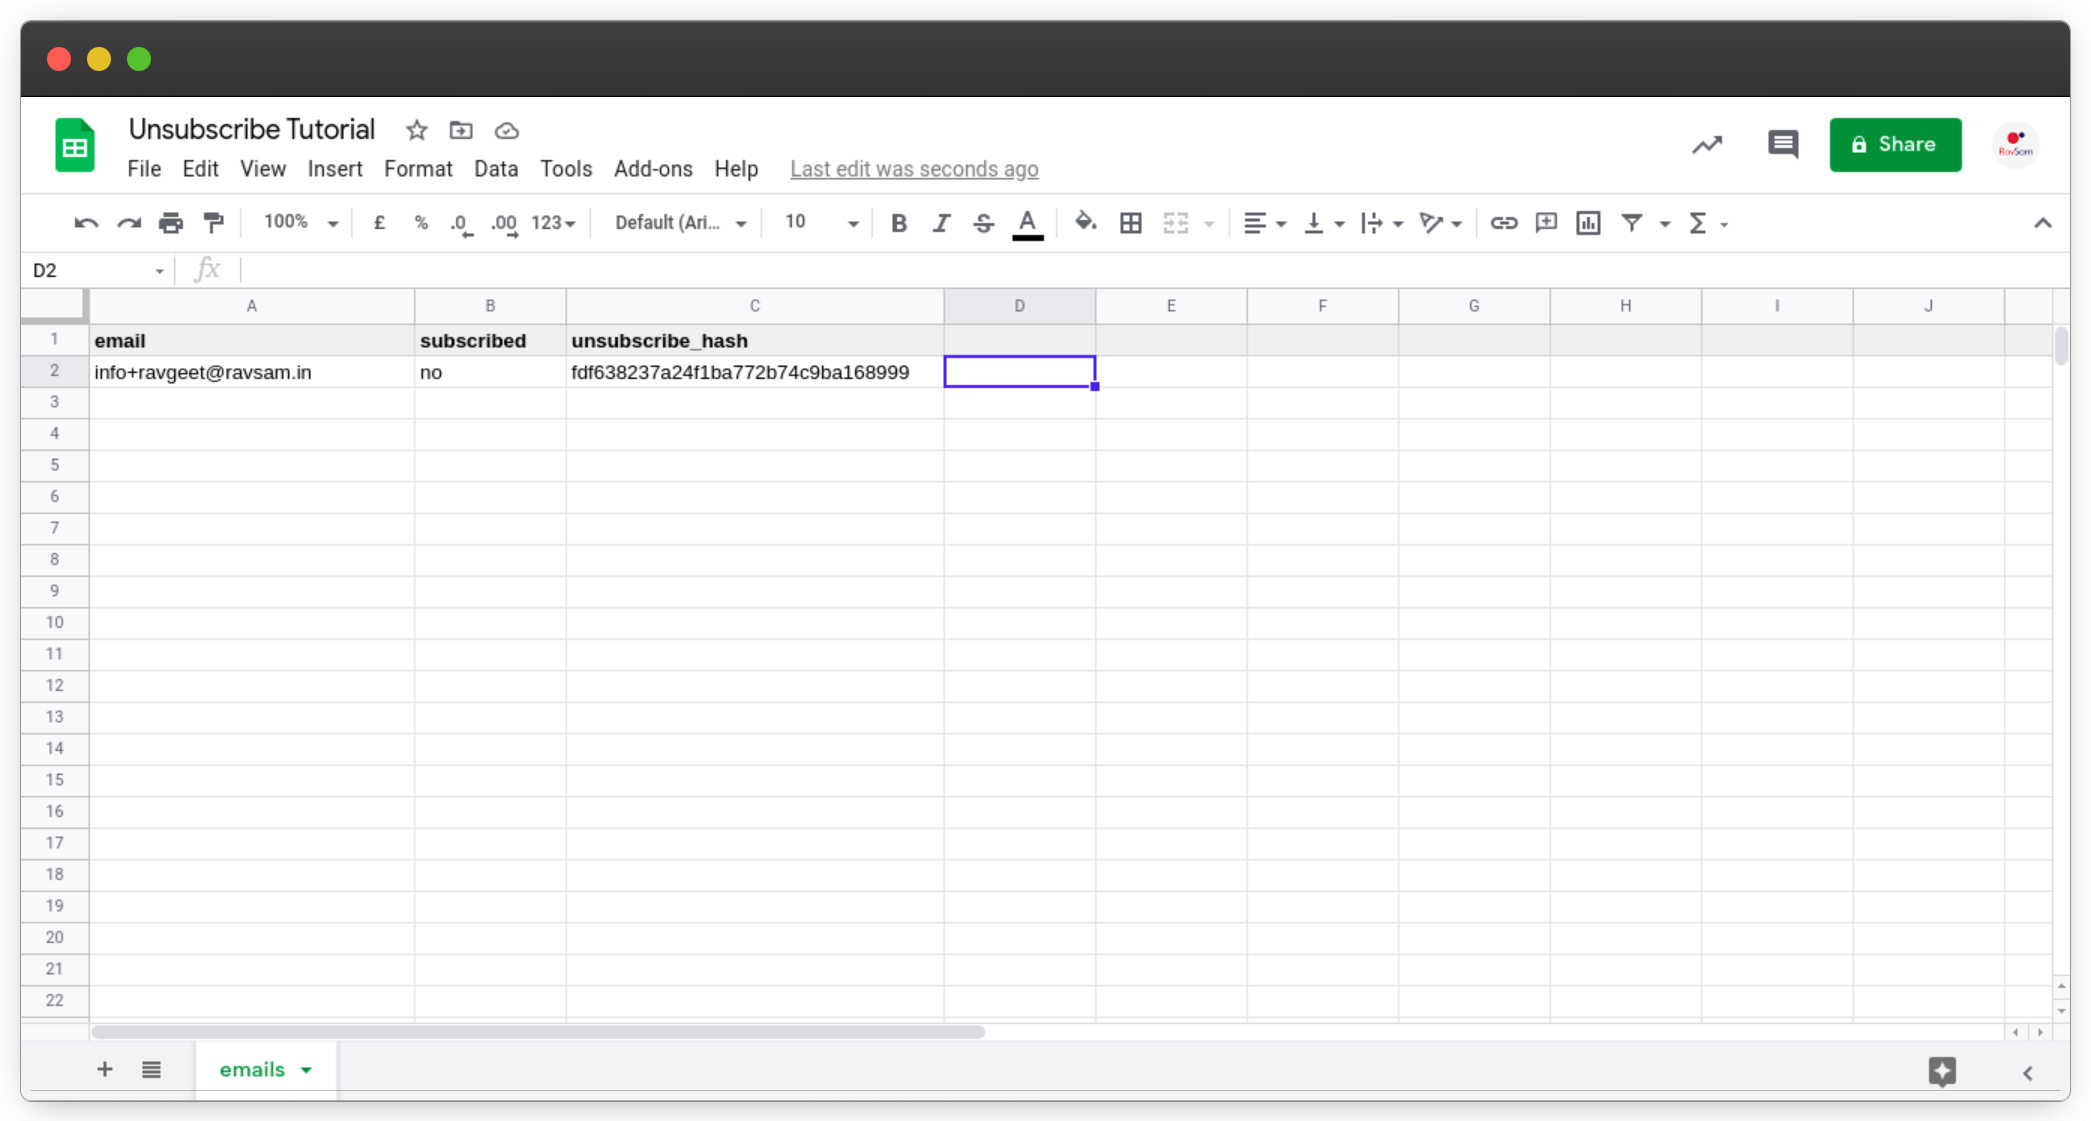*Google Sheet with updated data about the subscriber*
Oo Yea! We can see that the value for the `subscribed` field has changed to **no**. Using this workflow, we can provide our subscribers with an option to opt out of our mailing list for newsletters or maybe marketing emails.
Thanks for reading 💜
***
If you enjoyed my blog, follow me for more informative content like this.
I publish a [monthly newsletter](https://www.ravsam.in/newsletter/) in which I share personal stories, things that I am working on, what is happening in the world of tech, and some interesting dev related posts which I across while surfing on the web.
Connect with me through [Twitter](https://twitter.com/ravgeetdhillon) • [LinkedIn](https://linkedin.com/in/ravgeetdhillon) • [Github](https://github.com/ravgeetdhillon) or send me an [Email](mailto:ravgeetdhillon@gmail.com).
— [Ravgeet](https://www.ravgeet.in), *Full Stack Developer and Technical Content Writer*