Create JSON Feed for a Jekyll blog
Blog owners are migrating their blog feeds to JSON format. Take a look at how to add JSON feed to a Jekyll blog.

I am a full-time Software Engineer and Technical Content Writer. I code and write about React, Vue, Flutter, Laravel, Node, Strapi, and Python. I'm based in India🇮🇳 and currently work remotely for CloudAnswers.
I also author technical articles for tech startups that include Strapi, Twilio, CircleCI, Lightrun, CSS Tricks, Draft.dev and many other tech companies.
This blog was originally published on RavSam blog.
The big difference between JSON feed and XML feed is the ability to read and write JSON. Parsing XML is not an easy task whereas when it comes to JSON, we only have to write only a single line of code and use it any way we want. With the advent of JSON-based feed readers, it would be nice if we too have a JSON feed for our blog. In this article, we will be looking at how can use Jekyll and Liquid syntax to create a JSON feed for our blog.
Prerequisites
Before proceeding, we assume that
Our Jekyll blog is already set up.
Our blogs live at the
_blogsdirectory
Creating a feed.json file
First, we will create a feed.json file at the root of our website. We will add the following front matter to it:
permalink: /blog/feed.json
We can specify any permalink we want. Most of the time it is either /blog/feed.json or /feed.json.
Writing Liquid Code
Let us add the following Jekyll Liquid code to the feed.json file. This feed uses the most recent version of JSON Feed specifications.
{
    "version": "https://jsonfeed.org/version/1.1",
    "title": "{{ 'JSON Feed for ' | append: site.author | xml_escape }}",
    "description": {{ site.description | jsonify }},
    "favicon": "{{ '/assets/images/logos/favicons/apple-touch-icon.png' | absolute_url }}",
    "language": "en",
    "home_page_url": "{{ "/" | absolute_url }}",
    "feed_url": "{{ "/blog/feed.json" | absolute_url }}",
    "user_comment": "This feed allows you to read the blogs from this site in any feed reader that supports the JSON Feed format.",
    "items": [{% for blog in site.blogs reversed %}
        {
            "id": "{{ blog.url | absolute_url }}",
            "url": "{{ blog.url | absolute_url }}",
            "language": "en",
            "title": {{ blog.title | jsonify }},
            "summary": {{ blog.description | jsonify }},
            "content_html": {{ blog.content | jsonify }},
            "date_published": "{{ blog.date | date_to_xmlschema }}",
            "date_modified": "{{ blog.last_modified_at | date_to_xmlschema }}",
            "image": "{{ blog.image.path | absolute_url }}",
            "banner_image": "{{ blog.image.path | absolute_url }}",
            "authors": [{{ blog.author | jsonify }}],
            "categories": {{ blog.categories | jsonify }},
            "tags": {{ blog.tags | jsonify }}
        }
        {% unless forloop.last %},{% endunless %}{% endfor %}
    ]
}
Adding to Head
One final step is to add a reference to our JSON feed in the <head> tag of our website so that anyone looking for our blog feed can find it out here.
<link rel="alternate" type="application/json" title="Feed for RavSam Web Solutions" href="https://www.ravsam.in/blog/feed.json" />
Result
That’s it. Let us execute bundle exec jekyll serve and check out our feed at http://localhost:4000/blog/feed.json
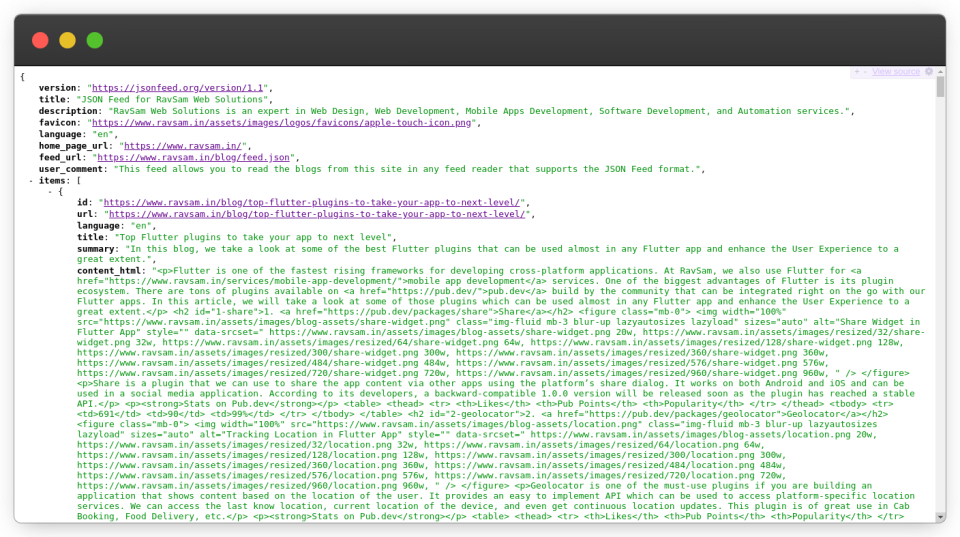 JSON Feed for a Jekyll blog
As we can see we have successfully created a JSON feed for our blog. We can submit this blog feed to a JSON Feed Reader.
We can also create JSON feeds for podcasts, microblogs, and submit them to content aggregators. As we move into the future, we will see more and more blogs migrating to the JSON feed as it is extremely easy to consume and set up.
Thanks for reading 💜
If you enjoyed my blog, follow me for more informative content like this.
I publish a monthly newsletter in which I share personal stories, things that I am working on, what is happening in the world of tech, and some interesting dev related posts which I across while surfing on the web.
Connect with me through Twitter • LinkedIn • Github or send me an Email.
— Ravgeet, Full Stack Developer and Technical Content Writer